How to Master Wood Floor Staining for a Professional Finish
Over the years I have sanded and restored a lot of London floors. The ones that stick in my mind are not the flawless new installations but the old solid wood floors that someone tried to refinish themselves and ended up with a blotchy, patchy mess. Nine times out of ten the problem was not the sanding or the varnish. It was the staining. Wood floor staining is one of those jobs where a small mistake early on gets magnified into a permanent eyesore. Get it right, though, and you can transform a tired floor into something that looks a hundred years old in the best possible way.
I want to walk through the practical decisions you face when you stain a wood floor. This is not a theoretical guide. It is what I have learned from doing the work day in, day out, and from fixing other people's mistakes.
Understanding Your Floor Before You Start
The first mistake people make is treating every wood floor the same. A parquet flooring panel from the 1920s behaves completely differently from a modern engineered wood floor. Solid wood floor planks soak up stain unevenly if they have been sanded with too coarse a grit. Engineered wood floors have a thin top layer, maybe three or four millimetres, and if you sand through that you are into the ply beneath. Before you even think about stain, you need to know what you are working with. A moisture meter is a cheap tool that tells you whether the wood is dry enough to accept stain. If the reading is above twelve percent, walk away. The stain will dry patchy and the finish will lift later.
Choosing the Right Stain for the Job
Not all stains are the same, and the choice depends on the wood species and the look you want. Spirit-based stain dries very fast, which makes it hard to apply evenly on a large floor area. I use it only for small repairs or touch-ups on end grain where I need a quick result. For a whole room I prefer gel stain. Gel stain has a thicker consistency, so it does not run into the grain unevenly. It sits on top of the wood a little longer, which gives you time to wipe off the excess and avoid lap marks. That extra working time is worth its weight in frustration.

Water-based polyurethane stains are another option. They are low-odour and clean up with water, which is handy in occupied flats. But they can raise the grain of the wood, which means you have to do a light sanding between coats. If you skip that step the final surface feels rough, no matter how good the stain colour is.
The Role of Wood Grain Filler
Open-grained woods like oak or ash need a wood grain filler before staining. Without it the stain sinks into the pores unevenly, leaving a speckled look that is hard to correct. I have seen people apply three coats of stain trying to fix this, and it never works. A single application of grain filler, sanded flat, gives you a uniform surface that accepts stain evenly. For parquet flooring with a lot of bevel edge detail, filling the grain first also stops stain pooling in the grooves and drying darker there.
Sanding: The Foundation of Good Staining
I cannot overstate how much the final stain colour depends on the sanding. Heavy sanding with a coarse grit opens up the wood fibres in a way that makes them drink stain like a sponge. Light sanding with a fine grit closes the surface and the stain sits more on top. The result is two completely different shades from the same can. For a solid wood floor I usually start with a rotary sander at 40 grit to remove old finish, then work up through 60, 80, and 120 grit. The final pass is with an orbital sander at 150 grit. That progression leaves the surface smooth but with enough open pores to take the stain consistently. If the floor has a bevel edge, I hand-sand those edges to avoid rounding them over with the machine.
Testing and Adjusting
Always test the stain on a scrap piece of the same wood, or in an inconspicuous corner. I keep a few offcuts from every job for exactly this reason. You might think you want a dark walnut tone, but on your particular oak floor it could come out almost black. Test it, let it dry fully, and then decide. You can also mix stains to get a custom colour. Tung oil and Danish Oil are not stains in the traditional sense, but they add a warm amber tone that many people prefer over a solid colour. They penetrate the wood rather than sit on top, so the grain stays visible.
Application Technique Matters
How you apply the stain is as important as the stain itself. For large areas I use a lambswool applicator on a pole, working in long, overlapping strips along the length of the boards. I never stop in the middle of a board because the overlap will dry as a visible line. For edges and corners I switch to a brush. You have to work quickly but methodically. If you are using a spirit-based stain, you have even less time before it starts to set.

Once the stain is down, wipe off the excess with a clean cloth. The timing of this wipe-off determines the depth of colour. Leave it on longer and the colour deepens. Wipe it off immediately and you get a lighter wash. For a consistent result, I set a timer and wipe each section at the same interval. It sounds fussy, but it stops the floor looking like a patchwork.
Sealing and Protecting the Stained Floor
After the stain has dried, you need a protective coat. This is where the choice of finish really matters. Osmo Polyx-Oil is a hard wax oil that gives a natural, matte feel and is easy to spot-repair later. It is not as tough as a full varnish, so for high-traffic hallways or commercial spaces I sometimes recommend a floor varnish instead. Fiddes Hard Wax Oil is another excellent oil-based option that penetrates well and leaves a durable surface. For a more traditional glossy look, Ronseal Diamond Hard Floor Varnish creates a tough, clear layer that stands up to heavy footfall.
If you prefer a water-based system, water-based polyurethane is low-odour and dries clear without yellowing over time. It does not have the same warm amber tone as oil, but for a modern interior that can be exactly what you want. Whichever you choose, apply two thin coats rather than one thick one. Thin coats cure harder and are less likely to peel later.
Maintenance After Staining
A freshly stained and sealed floor needs proper care to stay looking good. Bona hardwood floor cleaner is my go-to for day-to-day cleaning. It is pH-neutral and does not strip the finish. Avoid anything with ammonia or wax, which can cloud the surface or leave a sticky residue. For scratches or worn patches, you can spot-repair an oil-finished floor by lightly sanding the area and reapplying the oil. A varnished floor is harder to patch because the whole board often needs recoating to avoid a visible ring.
Common Pitfalls and How to Avoid Them
One of the most common mistakes I see is applying stain over an unevenly sanded floor. The low spots get more stain and dry darker, creating a mottled effect that no amount of topcoat will hide. Another issue is not accounting for the end grain of boards, especially in parquet flooring. End grain absorbs stain much more than the face grain, so those pieces can end up looking almost black. You can avoid this by applying a thin washcoat of thinned finish to the end grain first, which seals it slightly and reduces absorption.
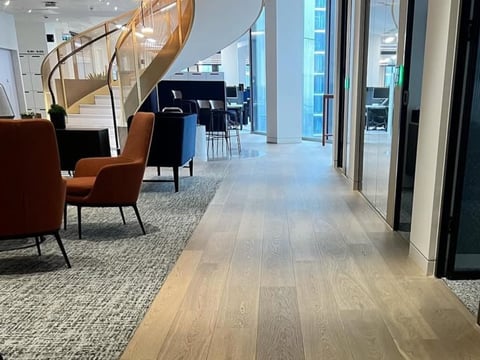
Wood floor staining is not a fast job. Rushing it leads to mistakes that take hours to undo. But when you take the time to prepare the surface properly, choose the right stain for the wood, and apply it with care, the result is a floor that adds real character to a room. It is one of those skills that rewards patience and attention to detail.
Final Thoughts on the Process
Every floor tells a story. The dents, the gaps between boards, the way the light catches the grain. A good stain job does not erase that story. It just makes it easier to read. Whether you are working with a solid wood floor that has been under carpet for thirty years or a new engineered wood floor that needs a richer colour, the principles are the same. Know your wood, prepare the surface, test everything, and give yourself enough time to do it properly. That is the difference between a floor that looks like it was done by a professional and one that looks like a weekend project gone wrong.
Ends · WOODFLOORSTAININGSCOPE